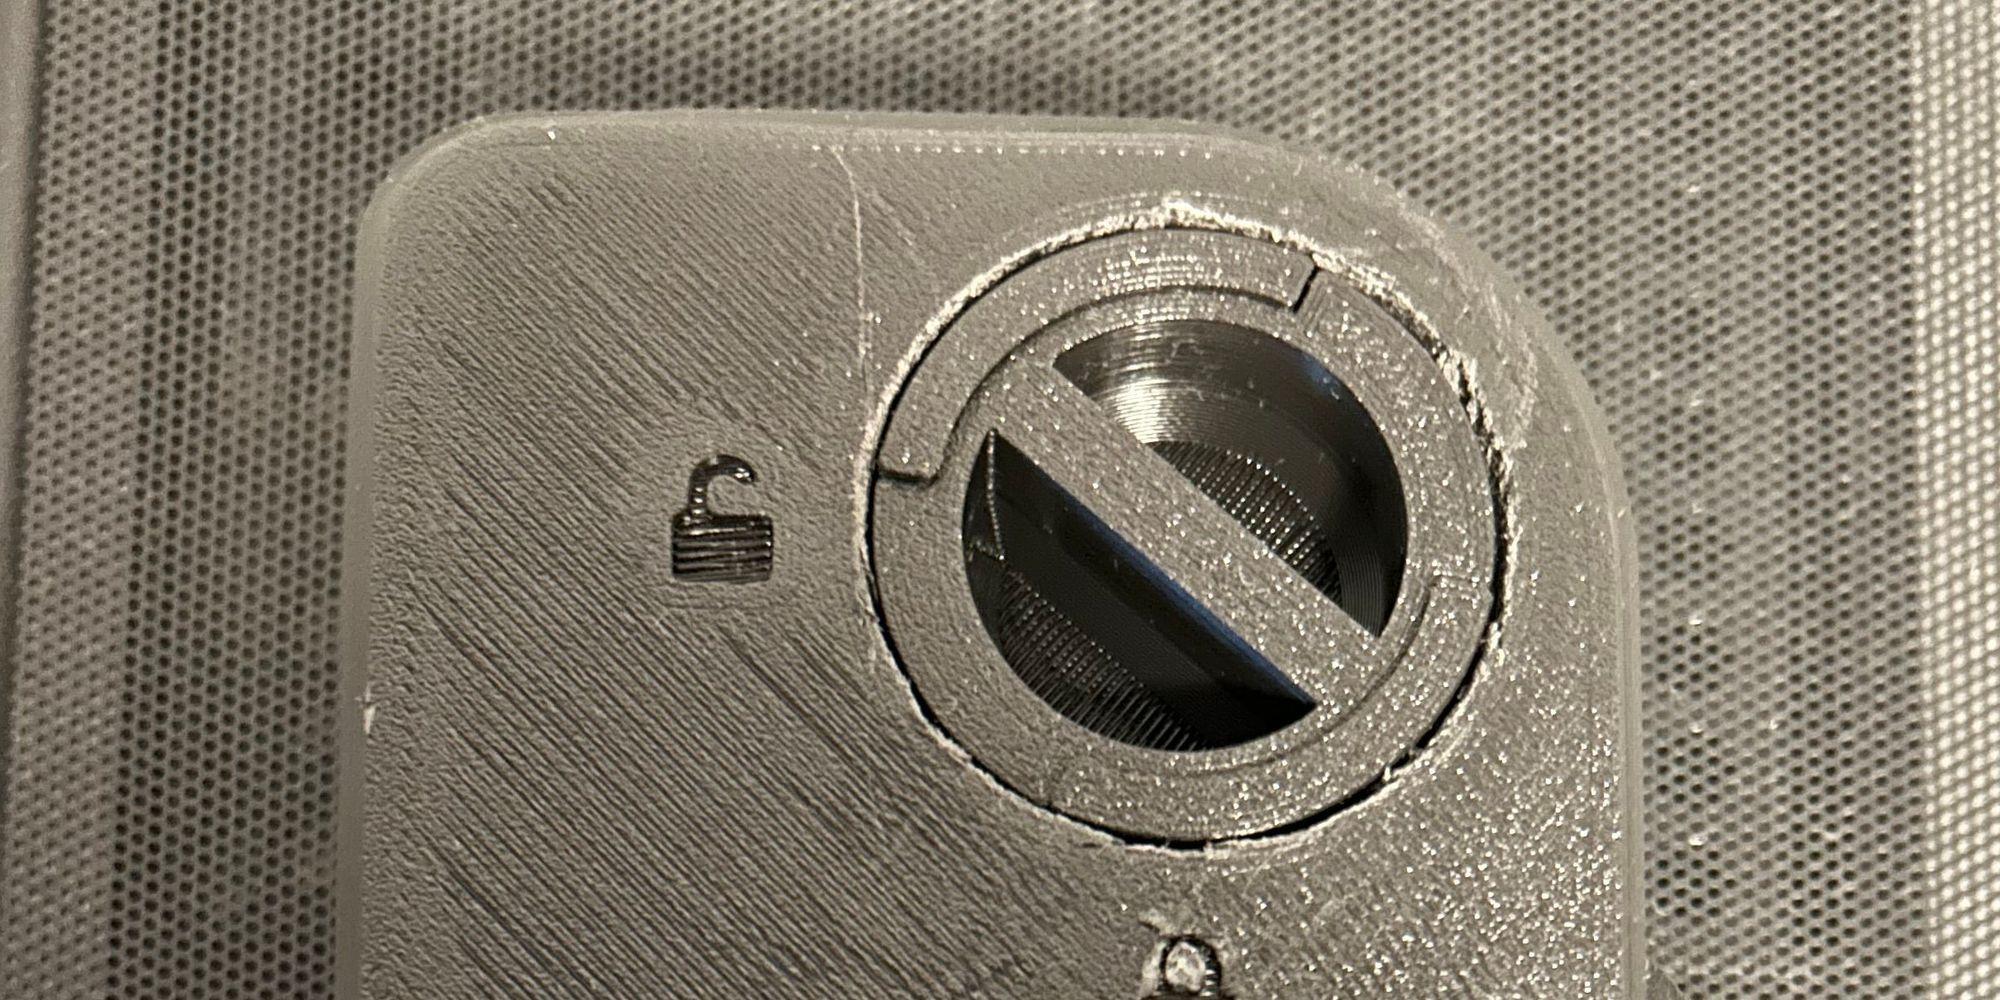
I wanted a travel case for my Philips OneBlade. On Printables I found one by FAYRON↗ that prints in one go: case, hinge and a rotating lock dial, "no assembly, no supports". I printed it on my Elegoo Neptune 4 Plus in eSUN PLA+. Six and a half hours later the case and the hinge came out perfect. The dial did not move at all.
This post covers why that happened, why a smaller dial can't just be printed and dropped in, and the three-piece replacement I ended up with. The repair took 15 g of PLA and under an hour of printing. A new case would have cost another 6h 26m and 172 g.
I did this entire project with Claude Code running Opus 5.5. It drove OrcaSlicer through an MCP server, measured the model and wrote the Python scripts that built the new parts. I did the printing, cutting and fitting.
Setting up the print#
My everyday profile had two problems for this model. Supports were switched on, and the slicer put support material inside the lock dial, where it would have been sealed in for good. It also printed outer walls at 120 mm/s.
Before changing anything I measured the gaps straight from the mesh. The dial sits 0.197 mm from the case for most of its height, and the hinge has 0.2 mm. Both are smaller than half a 0.42 mm extrusion line, so outer wall speed and accuracy matter a lot.
I made a separate print-in-place profile based on the designer's PrusaSlicer settings, which were still inside the 3MF:
| Setting | My old profile | Designer | New profile |
|---|---|---|---|
| Supports | on | off | off |
| Walls | 2, Classic | 3, Arachne | 3, Arachne |
| Outer wall speed / accel | 120 mm/s / 2500 | 45 mm/s / 1500 | 60 mm/s / 1500 |
| Avoid crossing walls | off | on | on |
| Infill | 15 % triangles | 10 % cubic | 10 % cubic |
Going all the way down to the designer's 45 mm/s would have added another 40 minutes, so I settled on 60 mm/s. That might have been a mistake. I'll get to that.
Why the dial welded#
Twisting, pressing and running a blade along the gap did nothing. Looking at a cross section of the model explained why.
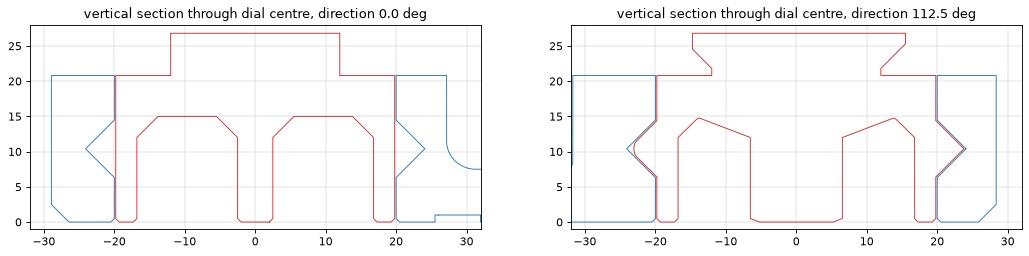
The dial is not a plain cylinder. It has two hidden V-shaped tabs with 45° flanks that run in matching grooves inside the case. They sit between 6.5 and 14.3 mm up, about 6.5 mm behind each face, so no blade can reach them. They also print about 1° from the end of the groove, so from the printed position the dial can only turn one way, by about 90°. My first advice from Claude was to twist it both ways and cut along the gap. That was before we knew about the tabs, and it was wrong.
On a 45° flank, a 0.197 mm horizontal gap is only about 0.14 mm measured square to the surface. The G-code shows it gets worse. Taking the toolpath centrelines and subtracting half the line width gives the real gaps between plastic edges:
| Spot | Gap |
|---|---|
| Straight wall | 0.20 mm |
| Lower tab ramp | 0.09 mm |
| Upper tab ramp | 0.07 mm |
Every layer on those ramps also hangs 0.2 mm over the layer below with nothing underneath. A tiny bit of sag closes 0.07 mm easily. So the ramps are almost certainly where it fused, although I never cut a ramp open to confirm it.
It's not just my printer. In the Printables comments around eight people report a dial that never came loose, and several more only freed it with pliers or a grinder. The fixes people report are scaling only the dial down by 0.5 to 1 % in X and Y, or splitting the model into separate parts. My faster outer walls probably didn't help, but people on the designer's own settings hit the same problem.
Why a smaller dial can't just drop in#
The obvious idea is to print only a slightly smaller dial. It doesn't work:
- The bore is 40.0 mm wide at both faces, all the way round. There is no slot that lets a tab slide in from the outside.
- The two tabs span 47.6 mm. A one-piece dial would need to shrink to about 84 % to fit through, and then the tabs wouldn't reach the groove anymore.
The groove is a closed ring that only exists because the dial was printed inside it. Whatever goes in there has to be assembled in place.
Two more details helped. The real lock is a bayonet head on top of the dial: two hooks that catch under ledges in the lid. The hidden tabs only hold the dial in the case and stop it at both ends of its 90° turn. So a replacement only needs to turn in the bore, stay in, and carry an exact copy of that bayonet head.
The three-piece replacement#
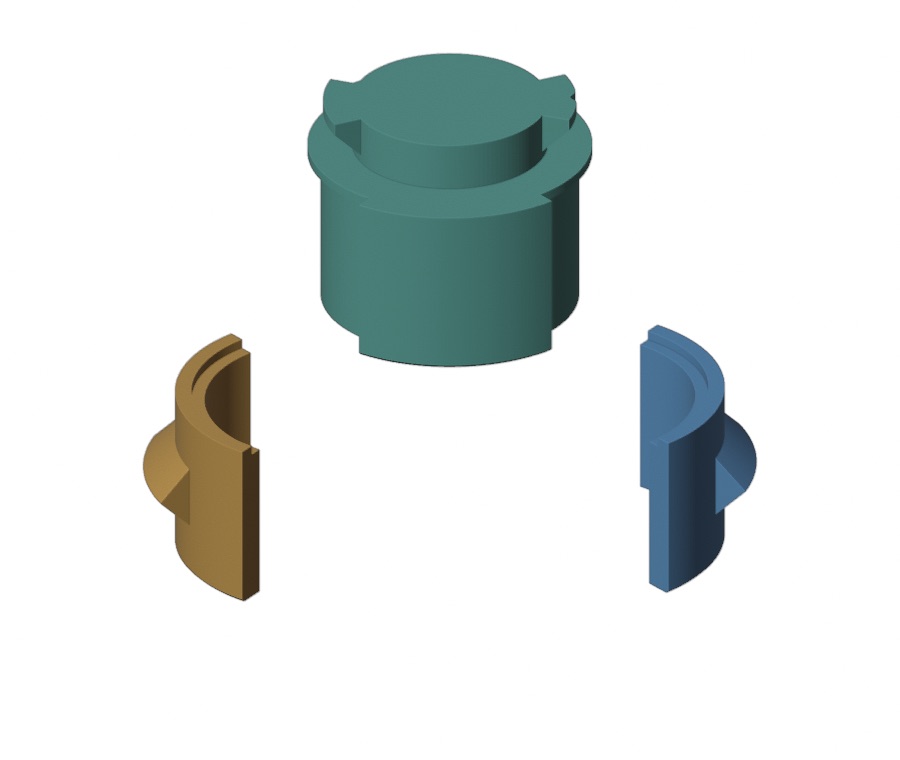
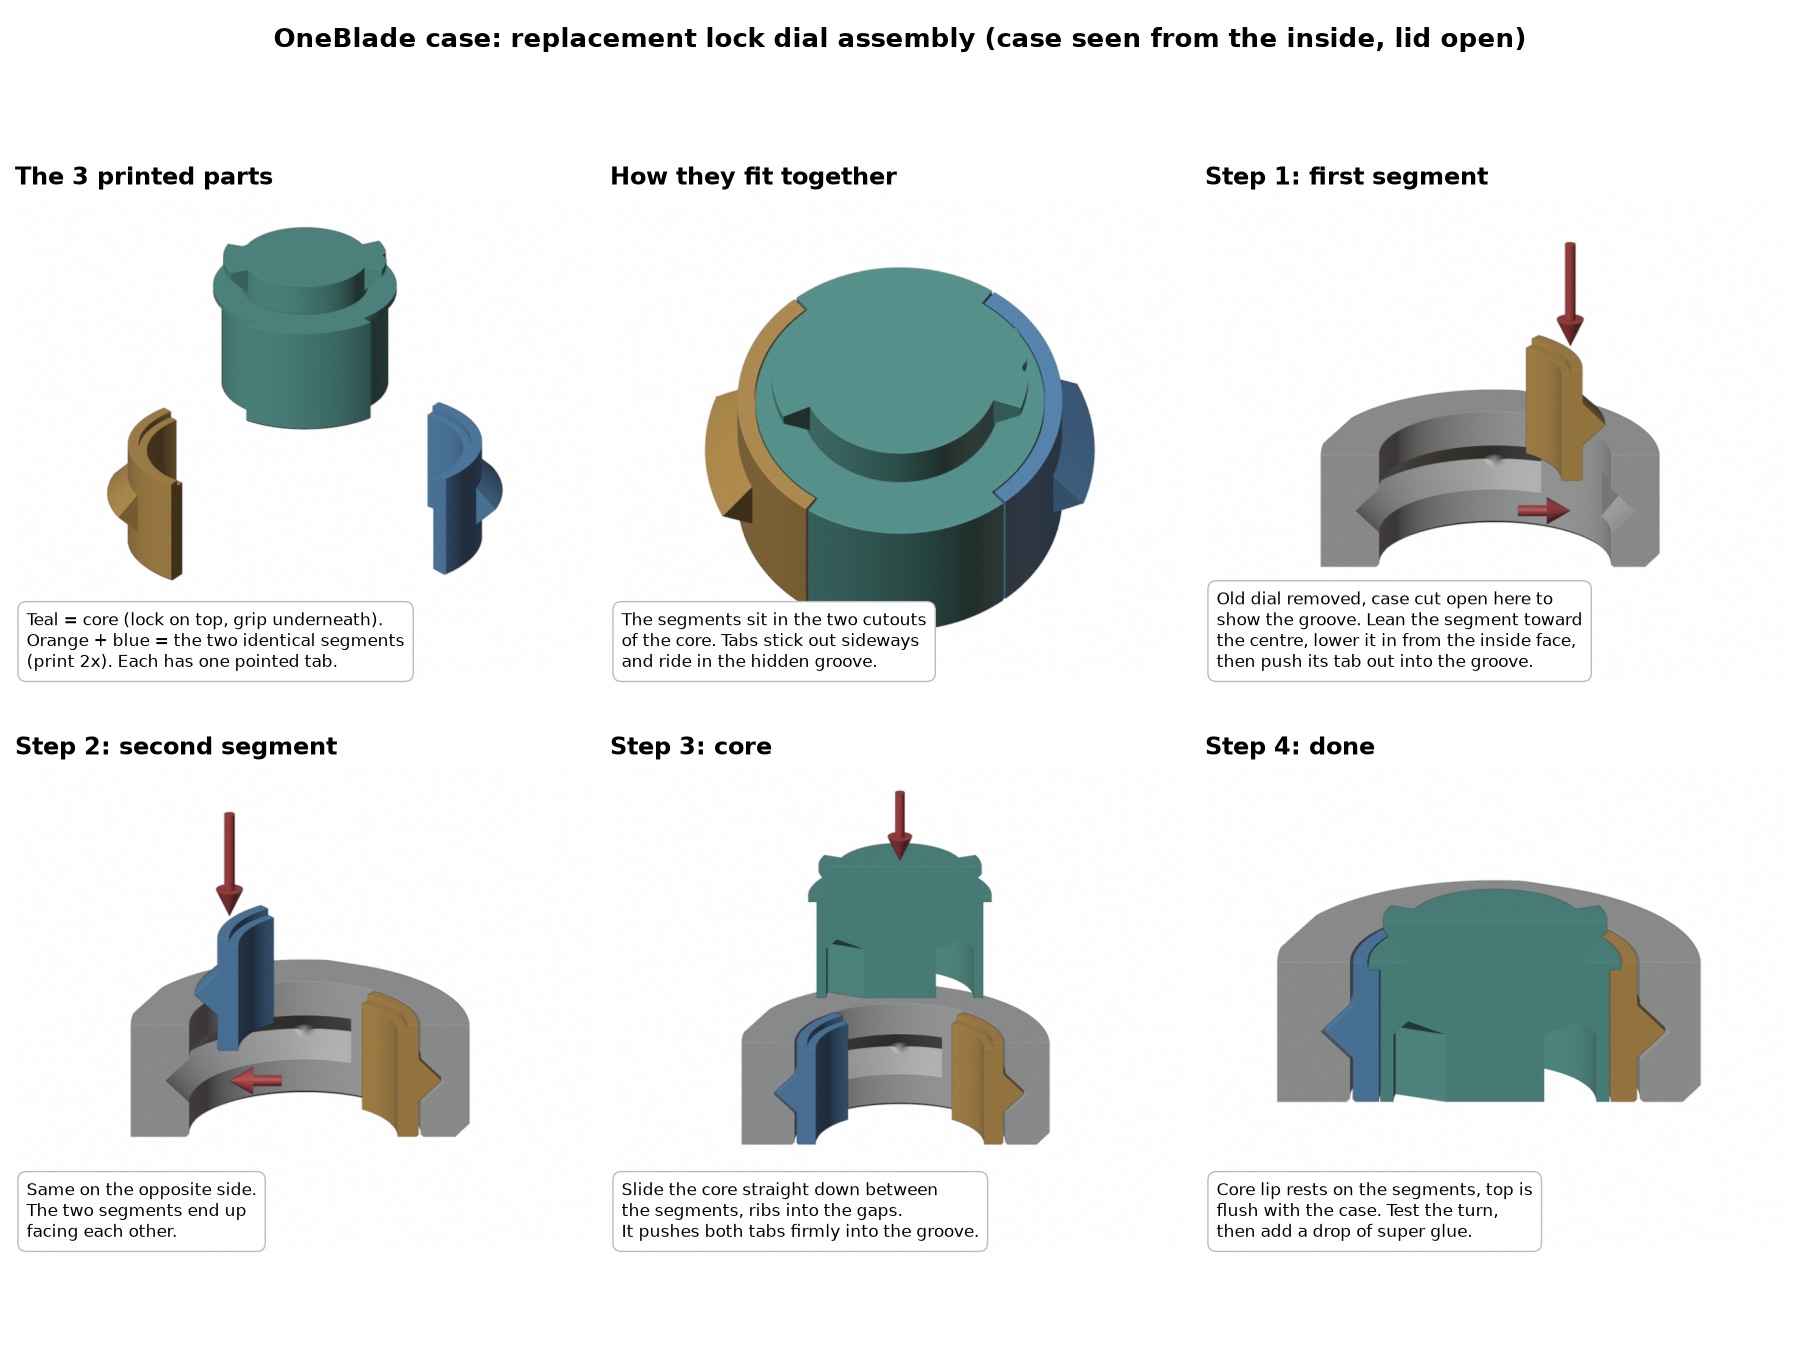
The new dial is two identical segments, each with one tab, and a core:
- Lean the first segment toward the centre, lower it in from the inside face and push its tab out into the groove.
- Do the same with the second segment on the opposite side.
- Slide the core straight down between them. Two ribs on the core fill the gaps and wedge both tabs into the groove.
- A lip at the top of the core rests on a step in the segments, so it can't fall out the other side. A drop of super glue holds it in place.
The core carries the original bayonet head on top and a finger grip underneath, both taken directly from the original mesh.
The parts have 0.4 mm of clearance to the case, twice the original. The original gap only failed because it was printed in place. These parts are printed separately and fitted afterwards, so nothing can fuse, and the extra room covers parts that print slightly fat and a bore that is rough from cutting the old dial out. The trade-off is a little play: about ±0.4 mm sideways and ±0.58 mm up and down.
Before printing anything, a verification script checked the parts against the real case mesh: no overlap when installed, no overlap while turning through the full 90°, both segments can pass the bore with a 4.5 mm inward lean, and the core slides down without hitting anything. All three parts print upright without supports in 46 minutes.
Where the CAD script went wrong#
The parts are generated with Python using manifold3d, shapely and trimesh. Three things broke along the way, and they're worth knowing if you build meshes in code:
- Polygon winding. manifold3d treats clockwise polygons as empty. The grip pockets came out of shapely clockwise and silently did nothing until they went through
orient(). - Coplanar faces. Joining solids that share a face left 912 pairs of coincident vertices, which are zero-thickness slivers. The fix was to build every piece oversized so they overlap, then trim everything with one outer envelope.
- Export. trimesh's default vertex merging turned the remaining near-duplicates into non-manifold edges. Exporting with
process=Falsekept the mesh watertight.
Getting the old dial out#
This was the part I was most nervous about, because the case wall sits right behind the dial.
From the outside, the old dial is a 3 mm ring with a bar across the middle and two deep pockets on either side. I cut the raised lock head flush on the inside face, drilled up through the pocket ceilings with an 8 to 10 mm bit and broke out the bar. Then I made a few vertical cuts through the ring, careful not to go deeper into the case wall, and bent each piece inward with pliers until the welds snapped. The pieces with the tabs came out once the middle was gone.
If you use a rotary tool, run it slow. Fast PLA just melts and welds itself back together.
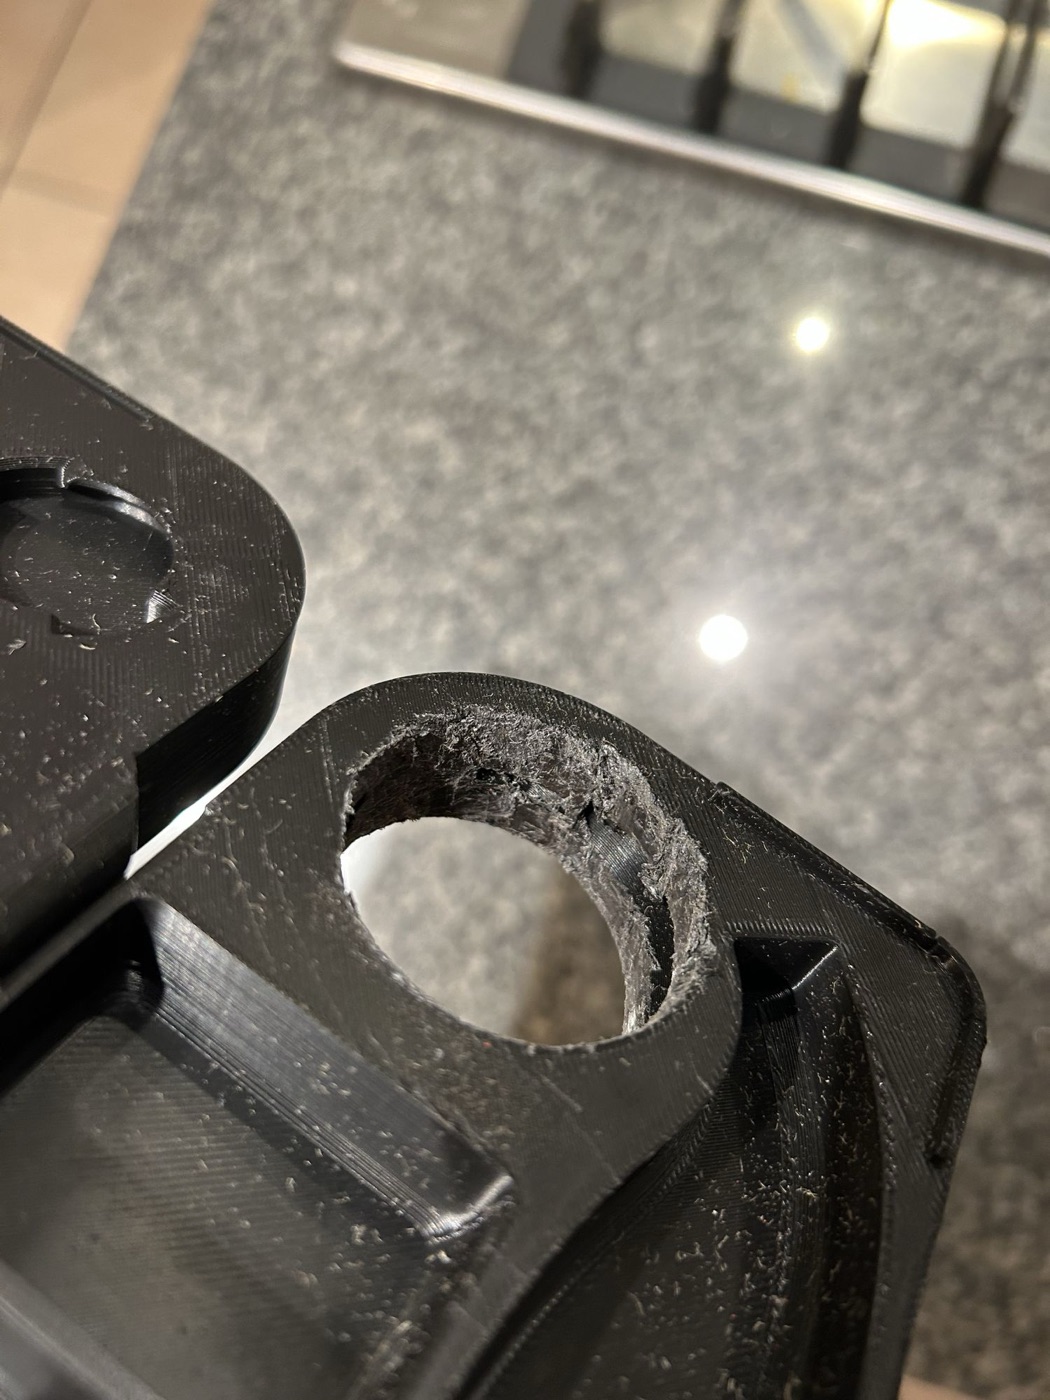
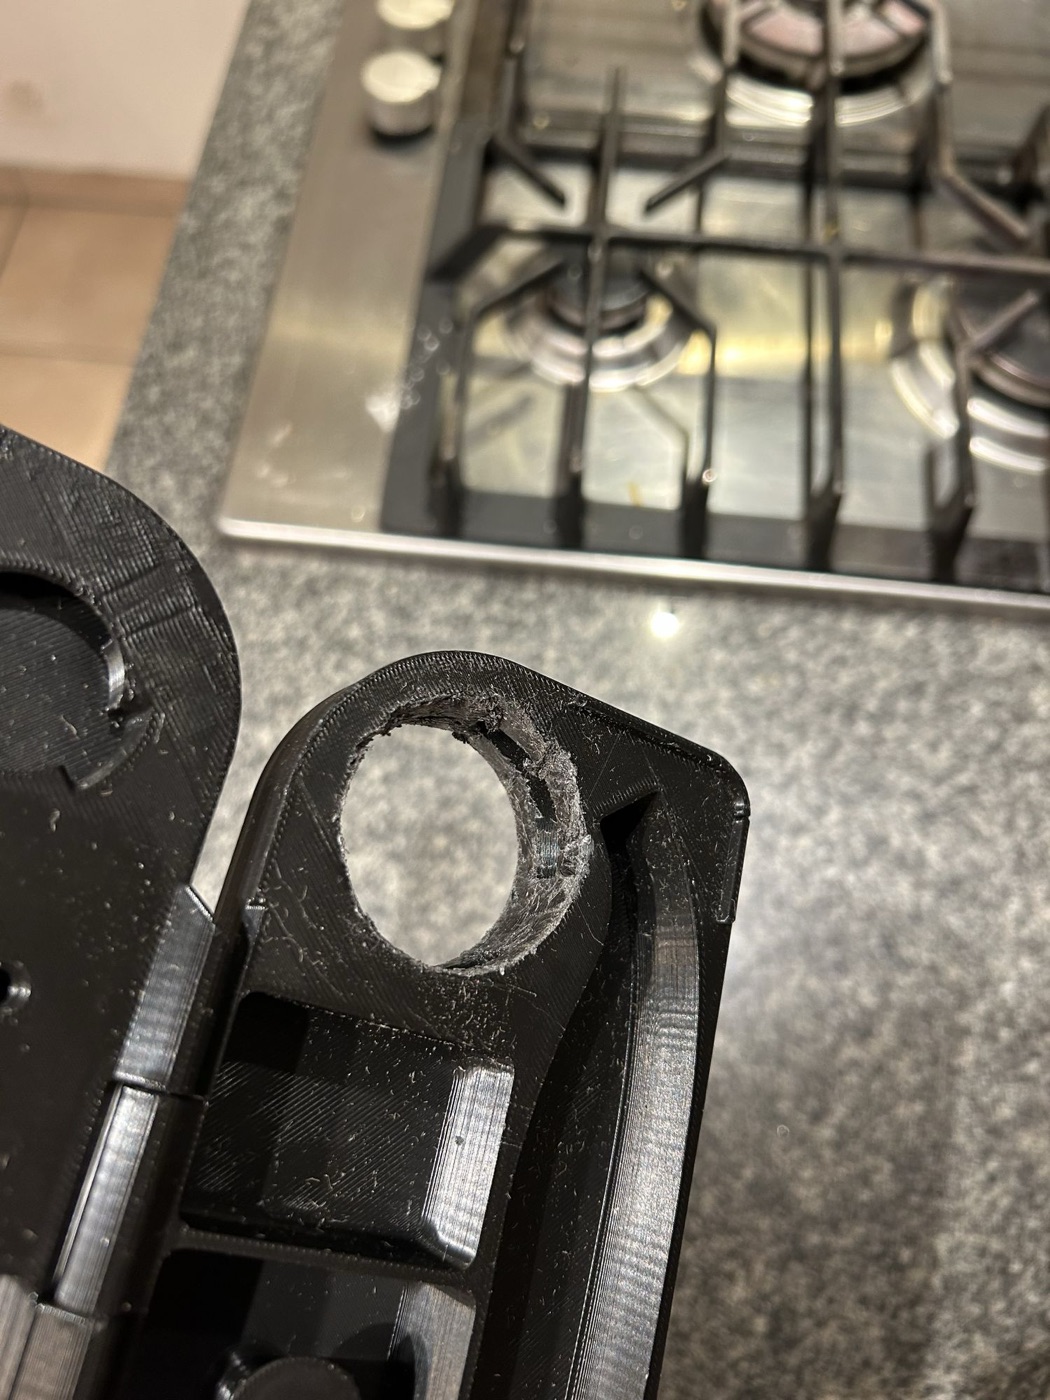
It's not pretty. The bore came out rough and fuzzy, but the important part survived: the groove inside is still clean all the way round.
Before printing the full set I printed one segment as a test, 12 minutes and 2.5 g, to check that it clipped into the groove. It did.
Result#
It works, and the case didn't need a reprint. The dial turns and the bayonet locks the lid.
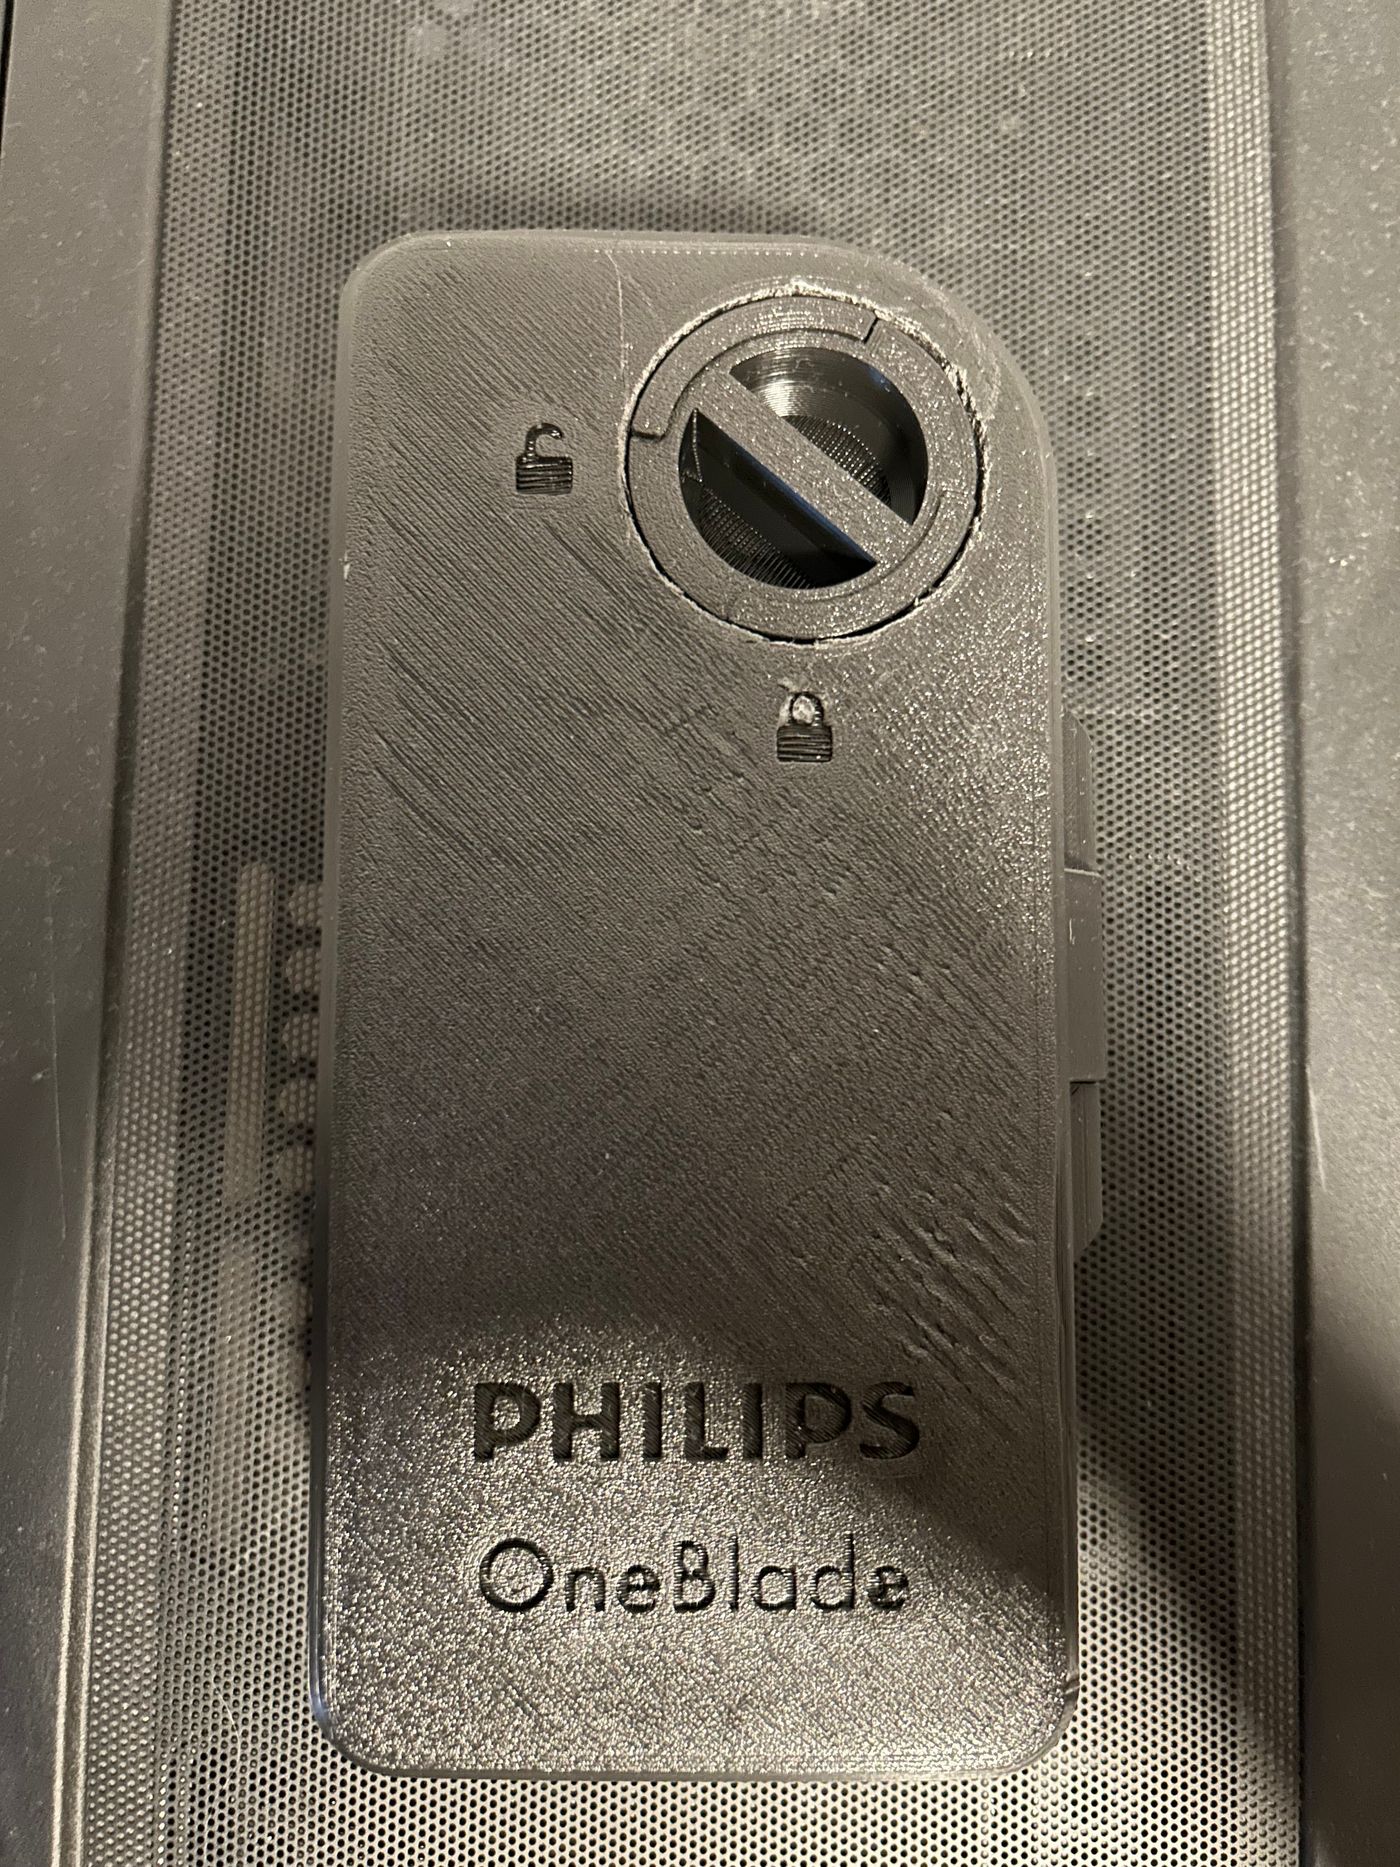
From the outside you can still see where the old dial was cut out, and the seams between the core and the two segments show if you look closely. I'm fine with that.
Turning it all the way open or closed feels a bit rough. My guess is the bore, which came out rough after drilling and cutting, and not the new clearances, since those are twice the original gap. It's good enough for a case that lives in a travel bag.
| Full reprint | Repair | |
|---|---|---|
| Print time | 6h 26m | under 1h |
| Filament | 172 g | 15 g |
If you're about to print this case, scale the dial alone to 99 % before you slice it and you'll probably never need any of this. If yours is already stuck, the dial can be replaced without throwing the case away.

Comments
Comments run on GitHub Discussions. You sign in with GitHub inside the box below.